By Guest Contributor Emily Magelof, Summer 2020 Media Team
This week, I headed back to camp to teach Marissa & Ali how to recycle some old clothes and make them trendy again – using bleach! Bleach Tie Dye is a “twist” on the classic colored Tie Dye that we all know and love. Bleach Tie Dye is simple, quick, cheap and so cute! You can also cut your clothing, as we did below, to give them a new and different look.
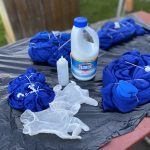
What you will need:
- A BOTTLE OF BLEACH
- A SQUEEZE BOTTLE
- GLOVES
- RUBBER BANDS
- DARKER COLORED CLOTHING
- TIP: Make sure that your clothing is made of AT LEAST 50% Cotton. The higher the Cotton count, the more the bleach will work. Our sweatshirts were made of 50% Cotton.
Check out our process below (see pictures at the bottom of the post):
STEP 1 – CUT
- After laying out all of our supplies outdoors, we cut the bottom seam off of our sweatshirts and pulled the edges so that the bottom would roll up a bit.
- Then, we cut a straight line slit in the middle of the neck. To create a V-Neck effect, we pulled the sides of the slits away from one another.
STEP 2 – TIE
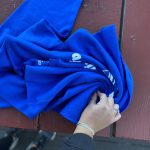
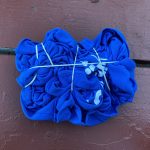
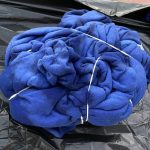
- Similarly to Tie Dye, we rolled and rubber-banded our sweatshirts into our chosen designs, Spiral and Crumple.
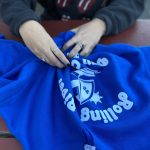
- For the swirl effect, we pinched the sweatshirt from the side, below the text, and twisted our hands until the fabric was completely rolled into a spiral. For the crumple effect, we gathered the fabric by scrunching it together and using many rubber bands in order to keep it in place.
- You can find other designs and techniques HERE!
STEP 3 – DAMPEN
- Once all items were safely tied up, we wet them with warm water in the sink but then squeezed out most of the excess water.
- Make sure your pieces are damp, not soaked
STEP 4 – GLOVE UP AND BLEACH!
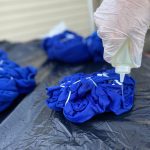
- We put on our gloves, poured our bleach into the squeeze bottles, and went to town!
- We applied the bleach to all items of clothing, front and back.
- The more fabric you have, the more bleach you should use – For example, we used almost an entire squirt bottle on one adult-sized sweatshirt. If you are doing a children’s t-shirt, use less!
STEP 5 – WAIT AND WATCH
- Once you are finished applying the bleach, leave your clothing to sit for about 10-25 minutes and watch the bleach do it’s magic.
- As mentioned, the higher the cotton count, the more the bleach will take to the clothing, so be sure to keep an eye on your items to make sure it bleaches to your desired effect.
- Since our sweatshirts were only 50% cotton, we let them sit for about 25 Minutes until they looked the way we wanted them to, however, it could take only 10 minutes for some other articles of clothing.
STEP 6 – RINSE
- Carefully, bring your bleached items to a sink and rinse them out very well.
- While rinsing with warm water, you can remove the rubber bands and admire your work!
STEP 7 – WASH AND DRY
- Throw your items into the washer ALONE! Do not wash with other clothing, or else the bleach will bleed.
- Put the items on a normal sized wash with normal detergent, as you would any other load of laundry.
- We then put them in the dryer, on a normal cycle, as well.
STEP 8 – ENJOY!
- If you followed these steps, take photos of your finished product and send them to us or tag us on Instagram @rollingriverdaycamp!
Bleach Tie Dye Process through Pictures

